Fun with Raspberry Pi – plasma simulation code performance

Raspberry Pi 3 Model B came out few months ago in February. It features a 1.2GHz 64-bit ARM CPU, 1Gb of RAM, built in WiFi, Bluetooth, HDMI, and 4 USB ports, all for under $40. This got me thinking: what if I got bunch of these boards and built a small MPI cluster? I run most of my codes on dedicated HPC machines, but definitely wouldn’t mind a local cluster for debugging or data crunching on smaller jobs. Including cases, cables, and SD cards, a four node cluster would cost under $250.
I wouldn’t be the first person to think of this. There is a great step-by-step tutorial on Makezine on how to make a 4-node cluster. There are even larger Raspberry Pi clusters in existence, including one with 120 nodes. To test the feasibility of this project, I ordered a Raspberry Pi from Amazon for $39.33. Besides the board, I also got a 32 Gb micro SD card (the computer does not come with any storage) for $10.59, and a clear plastic case for $6.95. Shipping was free thanks to Amazon Prime. The board does not come with a power supply but you can power it through one of the four USB Type A ports, or through a micro USB. I thought I had some spare micro USB cables around, but turns out that was not the case, and thus had to run to a local electronics store (Fry’s) to grab a USB to micro cable for $4.99. I ended up using a spare iPad charger with this cable but my docking station also puts out sufficient power. All together, the pieces cost $61.86 before tax.
Setup
My first impression after opening the box was that this thing is tiny! I never used a Raspberry Pi before but setting it up was trivial. First, you need to download the operating system and copy the image onto the flash card. Then simply connect your keyboard, mouse, and HDMI monitor to the board, and then plug in the power. You will see a red light come on. It may blink for a bit but after that should stay on, indicating the board is able to draw sufficient current. Next to it is a green light which I suspect indicates I/O operations on the SD card. The boot loader flies through the typical Linux start up sequence and maybe a minute later you will find yourself looking at the Raspbian Linux desktop. The distro comes with bunch of extras like Python, Java, and Mathematica. I was mainly happy to see that g++ version 4.9 was already installed. Few minutes later, after configuring the WiFi and changing keyboard to the US layout, I had a compiled version of the test plasma simulation code. I ended up using the CPU version of the 1D fully kinetic sheath code from the article on GPU computing, sheath-cpu.cpp.
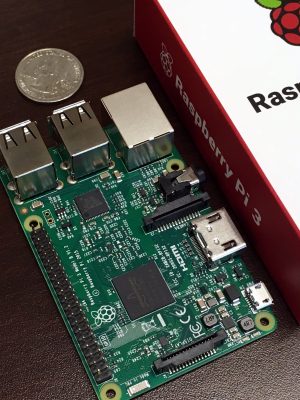
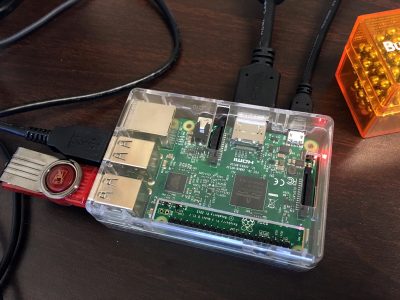
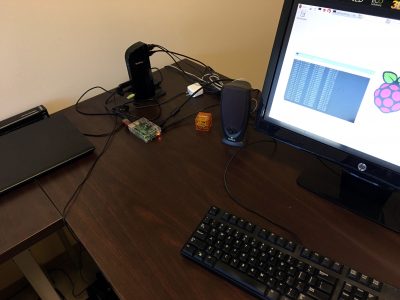
I have only one monitor in my office which I use with my laptop docking station. As such doing this initial setup required temporarily unplugging the laptop display. Now, while the Raspbian GUI is nice and all and could very much be used as a standard desktop, my main goal with this exercise was trying to see how easily the Raspberry Pi could be used for data crunching. As such, I ran raspi-config and changed the boot settings to boot into the text mode. This is also where you should make sure that ssh access is enabled. I then reconnected the docking station to my laptop and rebooted the Raspberry Pi without connecting any external peripherals such as the monitor or the keyboard. I started Cygwin on Windows, and tried “ssh-ing” into the box. I tried couple different IP addresses until one worked. I was in. I now had a $40 (okay $70 including the accessories) server at my disposal. Pretty neat. You can see this setup below in Figure 3. The board is now connected just to the power supply and could be stashed somewhere in the corner of your office.
Results
So how well did the mini-computer do? Below are the results. I compared Raspberry Pi to my laptop, which has Intel i7 2.4GHz CPU and is running Windows 7. Both codes were compiled using g++ -O2 -std=c++11 sheath-cpu.cpp. The Windows version was executed under Cygwin. As you can see, the x86 version finished about 4.8x faster.
***Intel i7 4700HQ 2.4Ghz, Cygwin under Windows***
TS:9900 np_i:468232     np_e:458656     dphi:6.22
TS:9925 np_i:468163     np_e:458584     dphi:7.11
TS:9950 np_i:468099     np_e:458576     dphi:5.89
TS:9975 np_i:468023     np_e:458519     dphi:5.42
TS:10000        np_i:467947     np_e:458470     dphi:5.24
Time per time step: 32.3 ms
real    5m23.710s
user    5m22.656s
sys     0m0.031s

***Raspberry Pi 3 Model B***
TS:9900 np_i:468180     np_e:458687     dphi:5.99
TS:9925 np_i:468113     np_e:458672     dphi:6.77
TS:9950 np_i:468056     np_e:458665     dphi:5.81
TS:9975 np_i:467996     np_e:458643     dphi:5.5
TS:10000        np_i:467940     np_e:458587     dphi:5.28
Time per time step: 155 ms
real    25m55.403s
user    25m53.870s
sys     0m0.460s
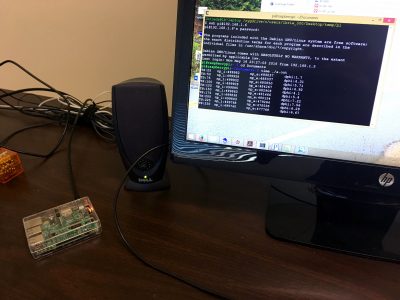
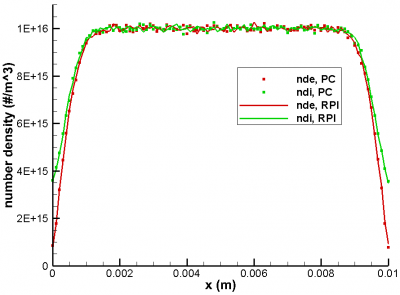
Comparing performance alone does not make sense without making sure the results are the same. But as can be seen from Figure 4, the results agree with each other. The small differences in bulk population are due to the statistical nature of the PIC code and are to be expected.
Summary
The plasma sheath simulation code running on Raspberry Pi was about 5x slower than the PC version. However, for a $40 computer the size of a credit card, this is not bad at all. I didn’t do any particular optimization for the ARM architecture, I just compiled the same code using the “-O2” compiler flag on both systems. The Raspberry Pi CPU has 4 cores, and during the simulation, CPU usage was only at 25%. Multihreading could thus substantially reduce the computational time, although a fair comparison would require making a similar modification to the PC version. However, one big difference here is that this Raspberry Pi system would then be a dedicated system for computations. My PC needs to multitask the computational code with other desktop applications. Also, the Raspberry Pi system can be left running overnight or when I am on travel. In conclusion, this exercise showed that Raspberry Pi could in fact be used to build a cheap cluster. I’ll try to get to that soon so stay tuned! In the mean time, please feel free to share your own experiences with Raspberry Pi.
Update 5/17/2016: I ended up using the server over night to run some Python script and am quite happy so far. This was much easier (and also more power efficient) than leaving my regular laptop powered all night.
This is pretty neat, I sort of remember some years ago someone (possibly yourself) looked at when the overhead of MPI outweighs adding more nodes. Do you have a feel for this? As in, with an inherent 5x performance hit you might not be able to scale up to much (relative to multicore PC) before diminishing returns.
Yeah, I think the main benefit is the tiny footprint of the Raspberry Pi and that it can be left to run simulations while my main computer is used for other things, like code development, email, etc… Also, it should be quite handy for debugging MPI codes.